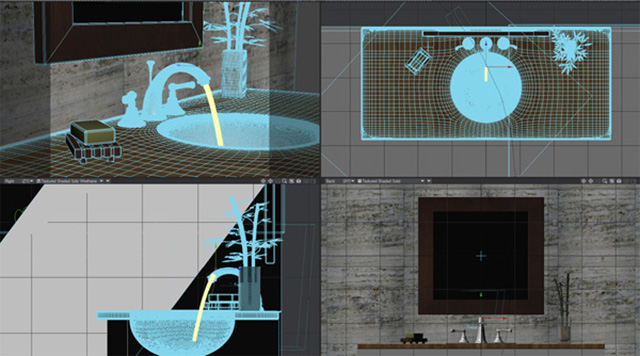
CGI (Computer-Generated Imagery) is the application of computer graphics to create or contribute to images. In many cases, it’s what a consumer sees when thumbing through a magazine or watching a video. If done by a professional CGI company, like TRG, most people can’t tell the difference between CGI images and organic photos.
When it comes to print media, there are several benefits of CGI. First, it allows a single artist to create content without the use of sets, a studio, or props. It also allows for images to be perfectly created to a client’s specifications. Additionally, CGI can save time in the long run if several versions of a single subject are desired, as the parts and pieces of a particular image can be saved, reused, or recombined infinitely.
There are multiple ways to create a single shot in CGI. Clients can send 3D files, and here at TRG, we can re-create images from drawings or we can even design and model CGI images ourselves.
In most cases a client provides us with an engineering CAD file. CAD stands for “Computer Aided Design” which are the files used to make the final product that consumers use. We can take the CAD files and produce a realistic image of the product even before the actual part is made. This allows clients to create imagery for non-existent products that are not even in the prototype stage yet.
How does CGI work? Read on to understand TRG’s step-by-step process for creating CGI images.
CGI 101 Step 1: Import File
First, we’ll need to import the CAD file and manipulate it into something we can work with. We will start to designate parts into the different surfaces and texture where they will ultimately live.
CGI 101 Step 2: Texture and Color
Next, we take the file into the rendering program where we develop textures and colors to match the final specs of a product. We use actual product samples to create the textures. We can also add logos and graphics at this point.
CGI 101 Step 3: Lighting
Here, we begin to light the subject using techniques similar to those used in the studio. We can save the scene and come back to it at any point―even years later―to rework a file. We also have the capability to perform pixel-for-pixel matches for product shots in multiple colors or finishes.
CGI 101 Step 4: Render File
After all textures and lighting are finalized, we will render the file. We can render anything from small, low-res for web to huge banners for trade shows.
CGI 101 Step 5: Review
Finally, we will bring the renders into post-production to quality check all files, making certain they are color-corrected to the desired standards.
Work with a CGI Company
Sounds simple, right? Not if you want to create good CGI images. However, TRG, has a team of dedicated CGI artists with the highest standards and the most up-to-date training and software. We love a challenge, and we can create a final product that meets the needs of our clients. Contact TRG Multimedia to start using CGI images for your next multimedia project. In the meantime, check out our CGI photo gallery to get a better picture of the different ways TRG can help with your multimedia needs.


